Vue通过配置WebSocket并实现群聊功能
写JQuery项目时,使用websocket很简单,不用去考虑模块化,组件之间的访问问题,面向文档编程即可,在Vue项目中使用websocket时,远远没有想象中的那么简单,需要考虑很多场景,本篇文章将与各位开发者分享下 vue-native-websocket 库的使用以及配置,用其实现群聊功能。先看下最终实现的效果 。
安装依赖
本文中对于 vue-native-websocket 库的讲解,项目中配置了vuex,对其不了解的开发者请移步官方文档,如果选择继续阅读本篇文章会比较吃力。
vue-native-websocket安装
# yarn | npm 安装
yarn add vue-native-websocket | npm install vue-native-websocket --save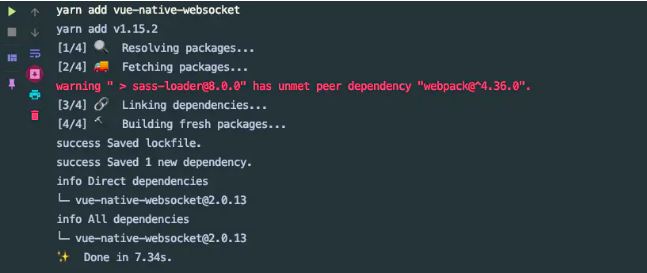
安装成功
配置插件
在 main.js 中进行导入
import VueNativeSock from 'vue-native-websocket'使用 VueNativeSock 插件,并进行相关配置
// main.js
// base.lkWebSocket为你服务端websocket地址
Vue.use(VueNativeSock,base.lkWebSocket,{
 // 启用Vuex集成,store的值为你的vuex
 store: store,
 // 数据发送/接收使用使用json格式
 format: "json",
 // 开启自动重连
 reconnection: true,
 // 尝试重连的次数
 reconnectionAttempts: 5,
 // 重连间隔时间
 reconnectionDelay: 3000,
 // 将数据进行序列化,由于启用了json格式的数据传输这里需要进行重写
 passToStoreHandler: function (eventName, event) {
 if (!eventName.startsWith('SOCKET_')) { return }
 let method = 'commit';
 let target = eventName.toUpperCase();
 let msg = event;
 if (this.format === 'json' && event.data) {
 msg = JSON.parse(event.data);
 if (msg.mutation) {
 target = [msg.namespace || '', msg.mutation].filter((e) => !!e).join('/');
 } else if (msg.action) {
 method = 'dispatch';
 target = [msg.namespace || '', msg.action].filter((e) => !!e).join('/');
 }
 }
 this.store[method](target, msg);
 this.store.state.socket.message = msg;
 }
});
vuex的相关配置:mutations和actions添加相关函数
// vuex配置文件
import Vue from 'vue'
import Vuex from 'vuex'

Vue.use(Vuex);

export default new Vuex.Store({
 state: {
 token:"",
 userID:"",
 // 用户头像
 profilePicture: "",
 socket: {
 // 连接状态
 isConnected: false,
 // 消息内容
 message: '',
 // 重新连接错误
 reconnectError: false
 }
 },
 mutations: {
 SOCKET_ONOPEN (state, event) {
 // 连接打开触发的函数
 Vue.prototype.$socket = event.currentTarget;
 state.socket.isConnected = true
 },
 SOCKET_ONCLOSE (state, event) {
 // 连接关闭触发的函数
 state.socket.isConnected = false;
 console.log(event);
 },
 SOCKET_ONERROR (state, event) {
 // 连接发生错误触发的函数
 console.error(state, event)
 },
 SOCKET_ONMESSAGE (state, message) {
 // 收到消息时触发的函数
 state.socket.message = message
 },
 SOCKET_RECONNECT(state, count) {
 // 重新连接触发的函数
 console.info(state, count)
 },
 SOCKET_RECONNECT_ERROR(state) {
 // 重新连接失败触发的函数
 state.socket.reconnectError = true;
 },
 },
 actions: {
 customerAdded (context) {
 // 新连接添加函数
 console.log('action received: customerAdded');
 console.log(context)
 }
 },
 modules: {
 }
})
至此 vue-native-websocket 配置结束,如需了解更多配置方法,请移步 npm仓库。
使用插件并实现群聊
在消息发送接收组件中添加 onmessage 监听(mounted生命周期中)
// 监听消息接收
this.$options.sockets.onmessage = (res)=>{
 // res.data为服务端返回的数据
 const data = JSON.parse(res.data);
 // 200为服务端连接建立成功时返回的状态码(此处根据真实后端返回值进行相应的修改)
 if(data.code===200){
 // 连接建立成功
 console.log(data.msg);
 }else{
 // 获取服务端推送的消息
 const msgObj = {
 msg: data.msg,
 avatarSrc: data.avatarSrc,
 userID: data.userID
 };
 // 渲染页面:如果msgArray存在则转json
 if(lodash.isEmpty(localStorage.getItem("msgArray"))){
 this.renderPage([],msgObj,0);
 }else{
 this.renderPage(JSON.parse(localStorage.getItem("msgArray")),msgObj,0);
 }
 }
};
实现消息发送
// 消息发送函数
sendMessage: function (event) {
 if (event.keyCode === 13) {
 // 阻止编辑框默认生成div事件
 event.preventDefault();
 let msgText = "";
 // 获取输入框下的所有子元素
 let allNodes = event.target.childNodes;
 for(let item of allNodes){
 // 判断当前元素是否为img元素
 if(item.nodeName==="IMG"){
 msgText += `/${item.alt}/`;
 }
 else{
 // 获取text节点的值
 if(item.nodeValue!==null){
 msgText += item.nodeValue;
 }
 }
 }
 // 消息发送: 消息内容、状态码、当前登录用户的头像地址、用户id
 this.$socket.sendObj({msg: msgText,code: 0,avatarSrc: this.$store.state.profilePicture,userID: this.$store.state.userID});
 // 清空输入框中的内容
 event.target.innerHTML = "";
 }
}
实现页面渲染
// 渲染页面函数
renderPage: function(msgArray,msgObj,status){
 if(status===1){
 // 页面第一次加载,如果本地存储中有数据则渲染至页面
 let msgArray = [];
 if(localStorage.getItem("msgArray")!==null){
 msgArray = JSON.parse(localStorage.getItem("msgArray"));
 for (let i = 0; i<msgArray.length;i++){
 const thisSenderMessageObj = {
 "msgText": msgArray[i].msg,
 "msgId": i,
 "avatarSrc": msgArray[i].avatarSrc,
 "userID": msgArray[i].userID
 };
 // 解析并渲染
 this.messageParsing(thisSenderMessageObj);
 }
 }
 }else{
 // 判断本地存储中是否有数据
 if(localStorage.getItem("msgArray")===null){
 // 新增记录
 msgArray.push(msgObj);
 localStorage.setItem("msgArray",JSON.stringify(msgArray));
 for (let i = 0; i <msgArray.length; i++){
 const thisSenderMessageObj = {
 "msgText": msgArray[i].msg,
 "msgId": i,
 "avatarSrc": msgArray[i].avatarSrc,
 "userID": msgArray[i].userID,
 };
 // 解析并渲染
 this.messageParsing(thisSenderMessageObj);
 }
 }else{
 // 更新记录
 msgArray = JSON.parse(localStorage.getItem("msgArray"));
 msgArray.push(msgObj);
 localStorage.setItem("msgArray",JSON.stringify(msgArray));
 const thisSenderMessageObj = {
 "msgText": msgObj.msg,
 "msgId": Date.now(),
 "avatarSrc": msgObj.avatarSrc,
 "userID": msgObj.userID
 };
 // 解析并渲染
 this.messageParsing(thisSenderMessageObj);
 }
 }
}
实现消息解析
// 消息解析
messageParsing: function(msgObj){
 // 解析接口返回的数据进行渲染
 let separateReg = /(\/[^/]+\/)/g;
 let msgText = msgObj.msgText;
 let finalMsgText = "";
 // 将符合条件的字符串放到数组里
 const resultArray = msgText.match(separateReg);
 if(resultArray!==null){
 for (let item of resultArray){
 // 删除字符串中的/符号
 item = item.replace(/\//g,"");
 for (let emojiItem of this.emojiList){
 // 判断捕获到的字符串与配置文件中的字符串是否相同
 if(emojiItem.info === item){
 const imgSrc = require(`../assets/img/emoji/${emojiItem.hover}`);
 const imgTag = `<img src="${imgSrc}" width="28" height="28" alt="${item}">`;
 // 替换匹配的字符串为img标签:全局替换
 msgText = msgText.replace(new RegExp(`/${item}/`,'g'),imgTag);
 }
 }
 }
 finalMsgText = msgText;
 }else{
 finalMsgText = msgText;
 }
 msgObj.msgText = finalMsgText;
 // 渲染页面
 this.senderMessageList.push(msgObj);
 // 修改滚动条位置
 this.$nextTick(function () {
 this.$refs.messagesContainer.scrollTop = this.$refs.messagesContainer.scrollHeight;
 });
}
DOM结构
通过每条消息的userID和vuex中的存储的当前用户的userID来判断当前消息是否为对方发送
<!--消息显示-->
<div class="messages-panel" ref="messagesContainer">
 <div class="row-panel" v-for="item in senderMessageList" :key="item.msgId">
 <!--发送者消息样式-->
 <div class="sender-panel" v-if="item.userID===userID">
 <!--消息-->
 <div class="msg-body">
 <!--消息尾巴-->
 <div class="tail-panel">
 <svg class="icon" aria-hidden="true">
 <use xlink:href="#icon-zbds30duihuakuangyou" rel="external nofollow" ></use>
 </svg>
 </div>
 <!--消息内容-->
 <p v-html="item.msgText"/>
 </div>
 <!--头像-->
 <div class="avatar-panel">
 <img :src="item.avatarSrc" alt="">
 </div>
 </div>
 <!--对方消息样式-->
 <div class="otherSide-panel" v-else>
 <!--头像-->
 <div class="avatar-panel">
 <img :src="item.avatarSrc" alt="">
 </div>
 <!--消息-->
 <div class="msg-body">
 <!--消息尾巴-->
 <div class="tail-panel">
 <svg class="icon" aria-hidden="true">
 <use xlink:href="#icon-zbds30duihuakuangzuo" rel="external nofollow" ></use>
 </svg>
 </div>
 <!--消息内容-->
 <p v-html="item.msgText"/>
 </div>
 </div>
 </div>
</div>当然,我们还有更方便快捷的在vue中使用websocket的方法,那就是使用GoEasy提供的websocket服务。
目前GoEasy提供完整的websocket前后端解决方案,简单的几行代码集成,即可快速搭建您的专属websocket服务。 同时支持各种前端技术框架如小程序、uniapp、vue,支持各种服务端语言如php、java、python等。对websocket有需求的开发者可以来注册试用一下【立即注册】